I've made trousers!
Hi guys!
So in my recent post called Autumn 2018 Sewing Plans I mentioned that I have been wanting to sew trousers, but had been struggling with getting the pattern and fit right. However I have FINALLY managed to get the pattern correct and fit on point, and I am soooooo happy! I thought I would break down the process on making my trousers, pattern, fit, sewing process, fabric.
Nevertheless, I thought I would redraft the pattern and put my own simple slanted pockets in. It worked out fine, but the overall fit of the trousers (the leg portion) was too big and I had to take out quite a big chunk out of the side seams. I don't think I cut the wrong size, but I think the overall style is bit looser than what I originally thought. After a little cry that my money had gone down the drain and still hadn't made a pair of trousers, I decided to draft them from scratch!
Pattern draft 2: Now this was no easy task! I had to figure out how to remove the waistband facing of the pattern, shorten the zip, make sure the length of the side seams were the same etc etc. Unfortunately I don't have a mock up of the pattern but I did make it too big again, but it was an improvement from the first draft.
Pattern draft 3: Overall the trousers were too high waisted, so instead of a 9" zip, it went down to 7" zip. I also had to rip out the pockets because I couldn't actually fit my hands in there. I also had to take a chunk out of the back seam as there was a lot of gapping. Overall after some tweaking around the legs I got my first pair of trousers made in this Rust fabric from my previous haul.
Pattern draft 4: I wouldn't say I was completely satisfied with the pattern, as I thought it was too high wasted, so I shortened the zip again to 5" for my next pattern. I also took in a chunk again from the calves and thighs. I also realised the fit I was going for is similar to Mimi G Style pattern simplicity 8749 pattern.
Pattern draft 5: The final draft! I think this one is nearly there; the fit around the waist and upper thigh is really good. There is still a little room around the knee and calves but I've left room on the pattern incase the fit changes with fabric, and I rather the trousers are a bit big than too small.

For the waistband, I just drafted one myself using some YouTube tutorials. Some patterns had a straight waistband which was cut it one piece, but my waistband was made of 4 pieces, left front, right front, left back, right back, and then repeated again for the inner waistband. the back pieces are straight, but I think I might curve them slightly to get a better fit.

Regarding sewing front fly zip, I used a different method on each trouser but the only one I liked in the end was this one because it you don't have to worry so much about changing between seam allowances and the zipper off set piece on the left front ensures that you don't see the zipper when the fly is closed. Unfortunately before I found the tutorial, I hadn't used this method on my black pair, so you can see the zipper slightly. But for my wool/tweed like trousers..... boy oh boy does the front fly zip look good (if I don't say so myself). Such a genius method!


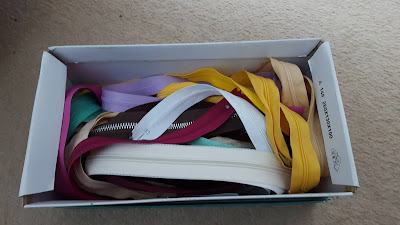
I also used plastic zips for all the trousers and cut them all to a specific length. My grandma had kindly gave me bunch of zips many years ago, so I'm so happy they are finally being used. I also really like the bright colours!
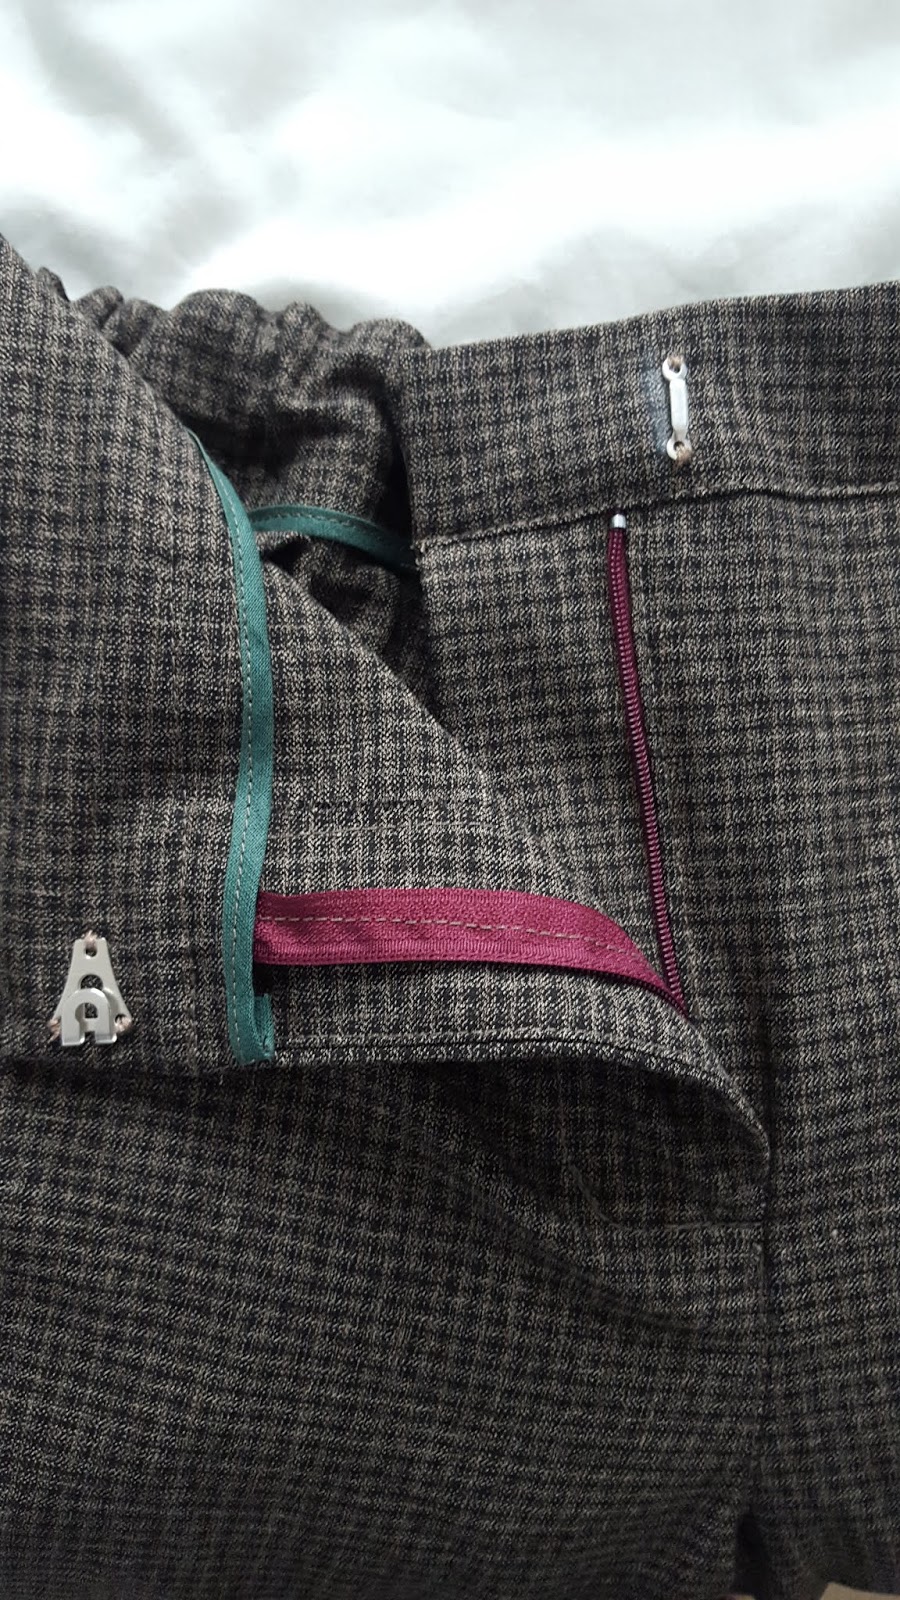
I also added a 3/4 inch elastic to the back waistband to help with the fit. My trousers aren't skin tight, and even if they were, I would be afraid that they would bag out over time. I added enough elastic so than they would hold the trousers up, but it wasn't too tight that weird pleating would happen. I've seen this quite a lot with most trousers and I also have a blog post on how to add elastic to trousers to pull in the waist.
For my tweed wool type trousers, I also added fake welt pockets at the back. Fake because they don't actually function, but I wanted to add them to break up the pattern at the back of the trousers. Now I had found tutorials on sewing a single welt pocket, but not a fake one. Lucky, I have a pair of trousers already which had fake welt pockets so I just inspected the construction and made my own. I think it gives a nice touch and isn't too bulky either!

I also top stitched each side seam down to secure the stitching and so it lasts longer!


Because of the range of fabrics, as I mentioned above, the fit of each pair is completely different. The black ponte knit trousers are nearly skin tight which I love as even the jeans I own aren't skin tight. But that's because there is enough stretch in the fabric for it to be skin tight (i.e. I can squat in them, dance in them etc). The rust pair are more looser, boyfriend style trouser which I don't mind. Finally the brown pair are nearly skin tight but not quite as it doesn't have that much stretch.
So in my recent post called Autumn 2018 Sewing Plans I mentioned that I have been wanting to sew trousers, but had been struggling with getting the pattern and fit right. However I have FINALLY managed to get the pattern correct and fit on point, and I am soooooo happy! I thought I would break down the process on making my trousers, pattern, fit, sewing process, fabric.
Pattern and Fit
Pattern draft 1: So initially I planned on using the McCalls 7726 sewing pattern as I wanted a paperbag waist style trousers and I thought I would learn how to use a proper sewing pattern (rather than draft it myself). However, upon sewing up a toile (well done me), I just couldn't understand why the pocket construction was made so confusing! I had seen some other sewers mention something about the pockets being a bit hard to do with the pleats, but maybe because it was all new to me I got more confused.Nevertheless, I thought I would redraft the pattern and put my own simple slanted pockets in. It worked out fine, but the overall fit of the trousers (the leg portion) was too big and I had to take out quite a big chunk out of the side seams. I don't think I cut the wrong size, but I think the overall style is bit looser than what I originally thought. After a little cry that my money had gone down the drain and still hadn't made a pair of trousers, I decided to draft them from scratch!
Pattern draft 2: Now this was no easy task! I had to figure out how to remove the waistband facing of the pattern, shorten the zip, make sure the length of the side seams were the same etc etc. Unfortunately I don't have a mock up of the pattern but I did make it too big again, but it was an improvement from the first draft.
Pattern draft 3: Overall the trousers were too high waisted, so instead of a 9" zip, it went down to 7" zip. I also had to rip out the pockets because I couldn't actually fit my hands in there. I also had to take a chunk out of the back seam as there was a lot of gapping. Overall after some tweaking around the legs I got my first pair of trousers made in this Rust fabric from my previous haul.
Pattern draft 4: I wouldn't say I was completely satisfied with the pattern, as I thought it was too high wasted, so I shortened the zip again to 5" for my next pattern. I also took in a chunk again from the calves and thighs. I also realised the fit I was going for is similar to Mimi G Style pattern simplicity 8749 pattern.
Pattern draft 5: The final draft! I think this one is nearly there; the fit around the waist and upper thigh is really good. There is still a little room around the knee and calves but I've left room on the pattern incase the fit changes with fabric, and I rather the trousers are a bit big than too small.

For the waistband, I just drafted one myself using some YouTube tutorials. Some patterns had a straight waistband which was cut it one piece, but my waistband was made of 4 pieces, left front, right front, left back, right back, and then repeated again for the inner waistband. the back pieces are straight, but I think I might curve them slightly to get a better fit.
Sewing
I made up all the trousers with my Industrial sewing machine and used my SINGER 538 for zig zag stitching around the side seams. I also bought some zip foots off eBay for my industrial machine which really helped.
Regarding sewing front fly zip, I used a different method on each trouser but the only one I liked in the end was this one because it you don't have to worry so much about changing between seam allowances and the zipper off set piece on the left front ensures that you don't see the zipper when the fly is closed. Unfortunately before I found the tutorial, I hadn't used this method on my black pair, so you can see the zipper slightly. But for my wool/tweed like trousers..... boy oh boy does the front fly zip look good (if I don't say so myself). Such a genius method!


I also added a 3/4 inch elastic to the back waistband to help with the fit. My trousers aren't skin tight, and even if they were, I would be afraid that they would bag out over time. I added enough elastic so than they would hold the trousers up, but it wasn't too tight that weird pleating would happen. I've seen this quite a lot with most trousers and I also have a blog post on how to add elastic to trousers to pull in the waist.
For my tweed wool type trousers, I also added fake welt pockets at the back. Fake because they don't actually function, but I wanted to add them to break up the pattern at the back of the trousers. Now I had found tutorials on sewing a single welt pocket, but not a fake one. Lucky, I have a pair of trousers already which had fake welt pockets so I just inspected the construction and made my own. I think it gives a nice touch and isn't too bulky either!

I also top stitched each side seam down to secure the stitching and so it lasts longer!
Fabric
I used quite a variety of fabrics for my different trousers:- Rust pair: Cotton

- Black pair: Ponte Knit

- Brown pair: Tweed wool type


Comments
Post a Comment